
Adding integrated LED lighting to a shower niche is one of the most effective ways to transform a standard bathroom into a high-end, luxury retreat. However, because this project involves mixing electricity with a wet environment, precision and high-quality materials are essential.
If you are using an encapsulated, waterproof LED system by MG SIgn, follow these 14 professional steps to ensure a clean result that lasts for years.
Phase 1: Pre-Installation & Rough-In
1. The "Check It Works" Rule.

Your kit arrives fully assembled. Test your lighting kit as soon as you receive it. Plug it into your power supply to ensure every LED is firing perfectly. It is much easier to address a concern now than after the tile is set.
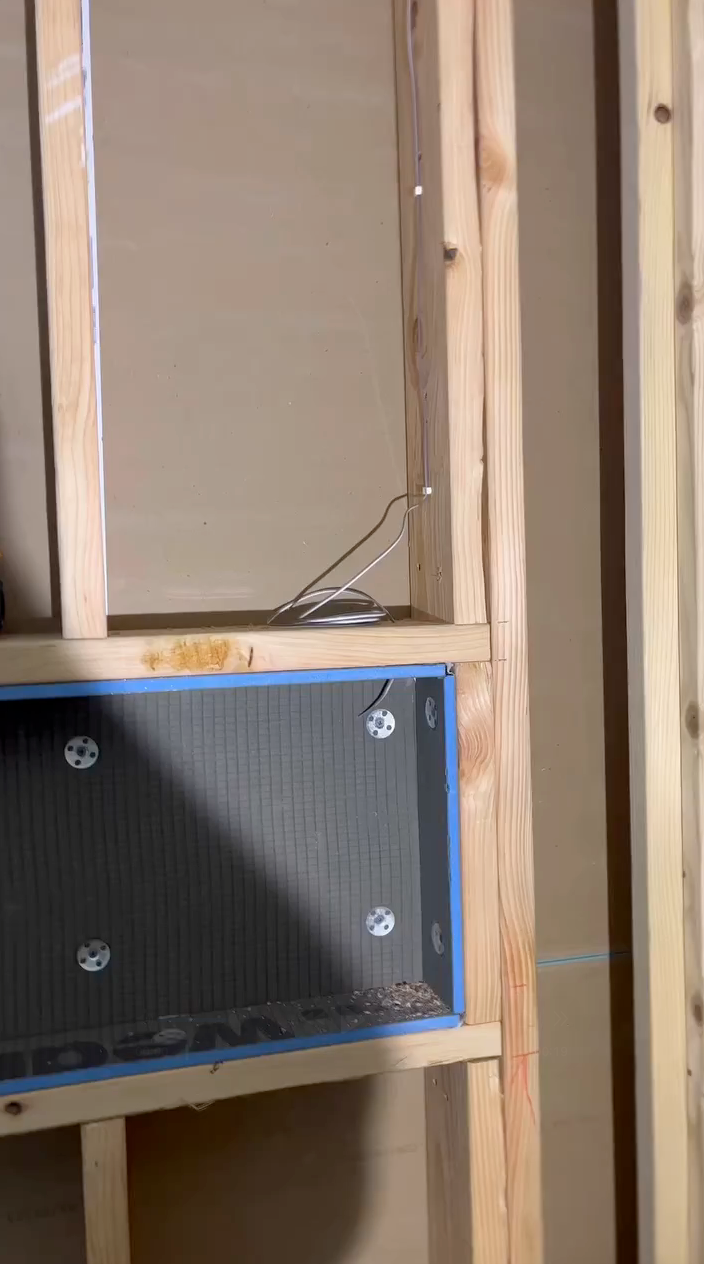
2. Finish the Framing

Complete your wall framing and niche opening before running any wires. Whether you are using a pre-fabricated niche or a custom-framed box, the structure must be solid and level.
3. Feed the Wire

Feed your low-voltage wire (20/3 for RGB or 18/2 for white) through the corner of the niche framing. Ensure there is enough lead length to work comfortably during the final connection.
4. Choose Your Wire Side

Decide if your wire will exit from the left or right side of the niche. Pro Tip: We recommend the right side; our kits are designed for right-side exit by default, which saves you from having to modify the components.
Phase 2: Customizing the Fit
5. Flip the Wires (Optional)

If your layout requires a left-side exit, simply remove the LED from the aluminum channel and flip the wires to the opposite side.
6. Trim the LED Strip (Optional)

If you mistakenly miscalculate a niche opening and order a slightly bigger kit size, don’t worry, you can trim it to your desired size. Trim silicone-encapsulated LED strip using standard scissors. Our LED strips can be cut anywhere—no specific "cut marks" are required.
7. Trim the Aluminum Channel.

We recommend cutting it manually using a hacksaw for the cleanest, most precise edge.
8. Seal and Waterproof the LED

Apply a non-acidic (neutral-cure) silicone to waterproof the LED light.

Note: We intentionally design our LED strips to be slightly smaller than the channel.This creates a "silicone pocket" that ensures a 100% waterproof seal and prevents mold buildup.
Phase 3: Electrical Planning & Tiling
9. Plan the Electrical Layout

Choose an accessible location for your power supply and RGB controller (such as inside a vanity or a closet). Never bury electrical components behind a wall.
10. Tile the Shower

Tile your niche in your preferred order. Most professionals start with the back wall, move to the sides, and finish with the bottom ledge. Keep the top untitled for now.
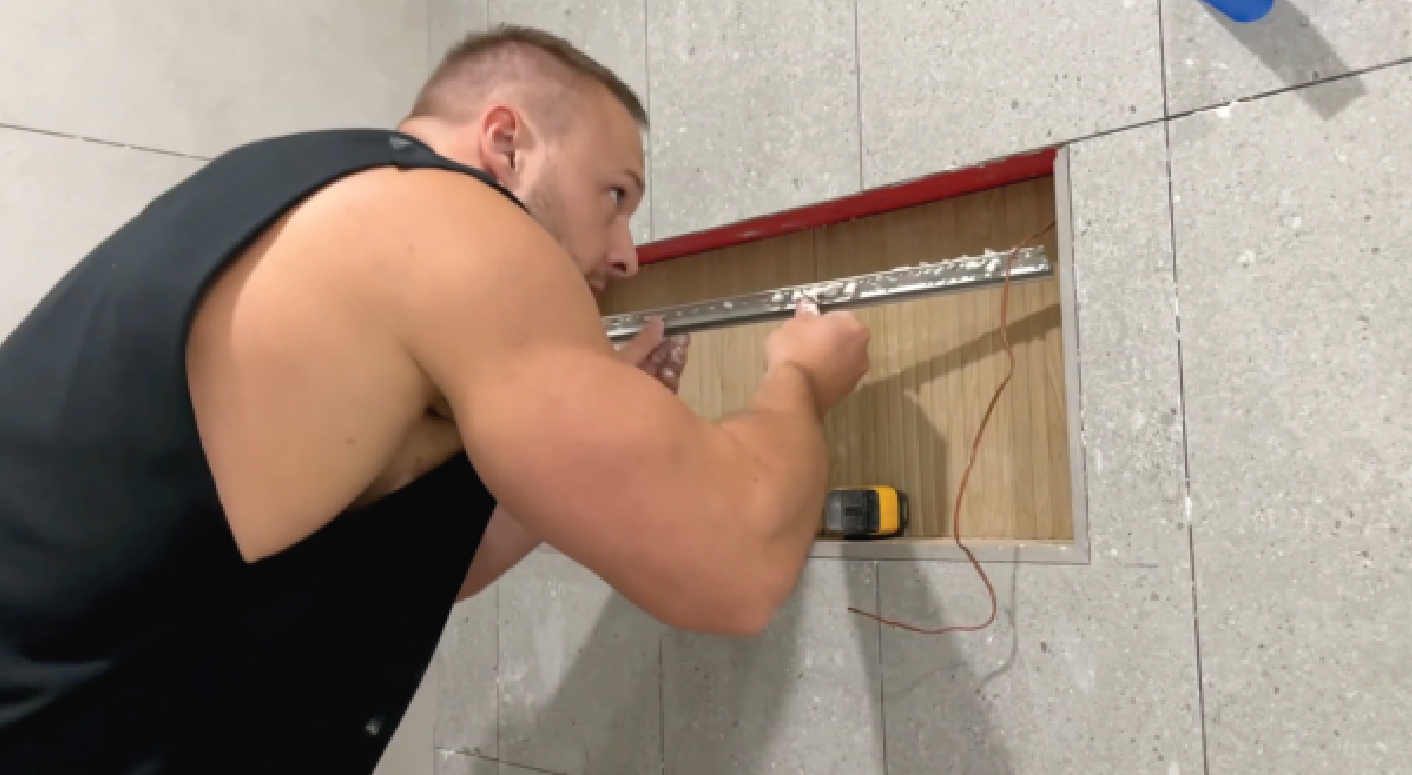
11. Install the Edge Profile.

Install your tile edge profile against the back wall to create a clean, finished transition for the light.
12. Finish Tiling.

Set your top tile in place. This "caps" the niche and defines the final opening where your light will sit.
Phase 4: Final Assembly
13. Connect the Wires Splice your leads using your preferred method: crimping, soldering, or wire nuts. Ensure all connections are secure and insulated.

14. Insert LED into the Channel

Gently press the LED strip into the pre-installed aluminum channel. Turn on the power and enjoy the smooth, dimmable "luxury hotel" glow of your new shower.
Final Pro-Tip for Homeowners
While these steps provide a clear roadmap, we always recommend consulting with a licensed contractor.
Leave a comment
All comments are moderated before being published.
This site is protected by hCaptcha and the hCaptcha Privacy Policy and Terms of Service apply.